Ensure a safe and successful woodworking project by checking off these essential items before you begin. Taking time to prepare will help avoid common pitfalls and create better results.
Remember: Safety should always be your top priority. Double-check all safety equipment and workspace conditions before starting your project.
This website contains affiliate links, view the disclosure for more information


A checklist ensures you plan every step, from materials to tools, reducing errors and saving time. It helps track progress, prevents missed tasks (like sanding or safety checks), and keeps projects organized.
Whether you’re a beginner or expert, a checklist minimizes oversights, ensures consistency, and helps manage complex builds by breaking them into manageable steps.
Include tools (saws, clamps, drills), materials (wood type, screws, glue), safety gear (goggles, masks), and project steps (measuring, cutting, assembly). Add pre-planning tasks like workspace setup, design sketches, and finishing details (staining, sealing).
Customize based on project complexity, but always prioritize safety checks and tool maintenance to avoid mid-project delays.
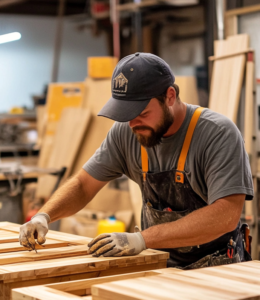
Always verify PPE (gloves, goggles, dust masks) and inspect tools for damage or dull blades. Ensure clamps secure workpieces, and check electrical cords for frays. Keep the workspace clutter-free to avoid tripping, and confirm ventilation for dust/fumes. Review emergency protocols (fire extinguisher location, first aid) and avoid loose clothing near machinery.
Start with planning (design, measurements, material lists), followed by preparation (tool setup, workspace organization). Prioritize cutting and shaping before assembly, and leave finishing (sanding, staining) for last. Group similar tasks (e.g., drilling all holes at once) to save time.
Always complete safety checks first, and avoid rushing critical steps like glue drying or paint curing.
Pause, assess the error, and determine if it’s fixable (e.g., recutting wood, filling gaps). Update your checklist to include corrective steps, like sanding uneven edges or recalculating measurements. Keep spare materials for replacements. Document mistakes to avoid repeats in future projects.
Flexibility is key—adjust the checklist as needed without compromising safety or quality.
Factor in project complexity, your skill level, and drying/curing times for finishes. Break tasks into smaller steps (e.g., “cutting legs: 30 minutes”) and add buffer time for unexpected delays. Track time during practice runs or simpler projects to create benchmarks.
Overestimating ensures you stay on track without rushing precision work.
A well-organized workspace boosts efficiency and safety. Include tasks like clearing debris, ensuring proper lighting, arranging tools within reach, and securing power sources. Prep surfaces (workbenches, sawhorses) for stability, and allocate zones for cutting, assembly, and finishing. A clutter-free area reduces accidents and streamlines workflow.
Review it before starting, after major milestones (e.g., completing cuts), and when transitioning between phases (assembly to finishing). Cross off completed tasks to track progress and identify upcoming steps. Regular reviews prevent skipped stages, especially for multi-day projects.
Adjust the checklist if you encounter design changes or material shortages.
Yes! Save templates for common project types (e.g., cabinets, frames) and modify them as needed. Note lessons learned (e.g., ideal blade types, glue brands) to refine future lists. Digital checklists allow easy editing, while printed copies can be annotated.
Reusing checklists saves time and ensures consistency across builds.