Did you know that up to 80% of pallets used in shipping are made from wood? This makes them a readily available and versatile material for creative pallet woodworking ideas. I’ve always been passionate about transforming simple materials into something extraordinary, and pallet wood has become one of my favorites.
Repurposing pallets is not only economical but also environmentally friendly. Many of these projects can be completed with basic tools like a prybar and cordless drill, making them accessible to beginners. Whether you’re working on indoor furniture or outdoor decor, pallet wood offers endless possibilities.
I often source my pallets from local businesses or warehouses where they’re delivered. This way, I get high-quality wood for free or at a minimal cost. The satisfaction of creating something unique from reclaimed materials is unmatched.
In this article, I’ll share step-by-step guides and innovative ideas to help you get started with your own pallet wood ideas. From functional furniture to decorative pieces, there’s something for everyone who wants to try a unique intermediate woodworking projects.

Key Takeaways
- Up to 80% of shipping pallets are made from wood, making them a readily available material.
- Repurposing pallets is both economical and environmentally friendly.
- Basic tools like a prybar and cordless drill are often all you need for these projects.
- Pallets can be sourced for free or at a minimal cost from local businesses.
- Pallet wood is versatile and can be used for both indoor and outdoor projects.
Getting Started with Pallet Woodworking
Starting with pallet wood projects can be easier than you think, especially with the right mindset and tools. I’ve found that planning is key to success. Before diving in, I always take time to sketch out my ideas and gather the necessary materials. This approach saves time and ensures smoother execution.
Having basic tools on hand is essential. A cordless drill, prybar, and sandpaper are often all you need to begin. These tools are affordable and widely available, making them perfect for beginners. I also recommend investing in safety gear like gloves and goggles to protect yourself during the process.
Finding free wood is another great way to start. I often visit local retailers or shipping warehouses to source pallets. Many businesses are happy to give them away, as it saves them disposal costs. Always inspect the wood for quality—look for sturdy, untreated pallets that are free from damage or pests.
Here’s a quick checklist to help you get started:
| Step | Details |
|---|---|
| Plan Your Project | Sketch your design and list materials needed. |
| Gather Tools | Basic tools like a drill, prybar, and sandpaper. |
| Source Pallets | Visit local businesses or warehouses for free wood. |
| Inspect Quality | Check for sturdiness and avoid damaged or treated pallets. |
Don’t let lack of experience hold you back. Pallet woodworking is beginner-friendly and rewarding. With a little effort, you can create functional and stylish pieces for your home. So, grab your tools and start your next project today!
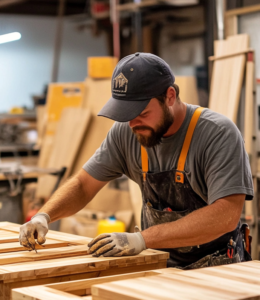
Essential Tools for Your Pallet Project
Having the right tools can make or break your pallet project. Whether you’re a beginner or a seasoned DIY enthusiast, the right equipment ensures safety, efficiency, and quality results. I’ve learned that investing in a few key items can transform a simple project into something extraordinary.

Basic Tools and Equipment
For most pallet projects, you’ll need a mix of hand tools and power tools. A cordless drill is essential for creating pilot holes and driving screws. I also rely on a prybar to carefully disassemble pallets without damaging the wood. Sandpaper or a sander helps smooth rough edges, making the wood safe to handle.
One of my favorite tools is a pneumatic nail remover. It’s a game-changer for pulling nails quickly and efficiently. If you’re working on larger woodworking projects, a circular saw or jigsaw can help you cut wood with precision. Remember, the best pallet projects start with the right tools.
Safety Gear and Best Practices
Safety should always come first. I never start a project without my gloves and safety goggles. Gloves protect against splinters, while goggles shield your eyes from dust and debris. If you’re using power tools, ear protection is also a must.
Here are a few safety tips I’ve learned over the years:
- Always inspect the wood for structural integrity before starting.
- Wear closed-toe shoes to protect your feet from falling tools or wood.
- Keep your workspace clean and organized to avoid accidents.
“Safety isn’t just a precaution—it’s a priority. Taking the time to protect yourself ensures you can enjoy the process and the results.”
With the right tools and safety measures, your pallet project will be both fun and rewarding. So, gather your equipment, suit up, and get ready to create something amazing! Also, look at beginner woodworking projects for extra help.
Finding Good Quality Pallets
Finding the right materials is the first step to any successful DIY project. For me, sourcing the best pallet makes all the difference. I’ve learned that not all pallets are created equal, and a little effort in selection can save time and frustration later.
I often start my search at construction sites, grocery stores, and home improvement centers. These places usually have a steady supply of pallets, and many are happy to give them away. Always ask for permission before taking any materials.

When inspecting a pallet, I look for dry wood with no stains or chemical treatments. Pallets marked with “MB” or “SF” should be avoided, as they’ve been treated with harmful chemicals. A quick visual check can help you avoid boards with major cracks or splinters.
Once I’ve found a good woodworking pallet, I focus on safely removing nails. A prybar or nail remover works well for this. Taking care during this step ensures the wood remains intact and ready for reuse.
Here’s a quick guide to help you source the best pallet:
| Location | Tips |
|---|---|
| Construction Sites | Ask for permission and inspect for quality. |
| Grocery Stores | Look for clean, untreated pallets. |
| Home Improvement Centers | Check for sturdy boards without cracks. |
Being proactive in sourcing quality materials, even when they’re free, ensures your project turns out just the way you envision it. So, take your time, inspect carefully, and start your next project with confidence!
Step by Step Guide to Upcycling Pallet Wood
Upcycling pallet wood into something beautiful is easier than you might think, and it all starts with the right preparation. Whether you’re a beginner or a seasoned DIY enthusiast, following a structured process ensures your project turns out just the way you envision it.
Preparing and Disassembling the Pallet
Before diving into your project, it’s crucial to prepare the pallet wood properly. I always start by inspecting the pallet for any signs of damage or chemical treatments. Look for sturdy boards that are free from cracks or splinters. Safety is key, so I wear gloves and safety goggles during this process.
Disassembling the pallet requires patience and the right tools. I use a prybar to carefully remove nails without damaging the wood. A cordless drill can also be helpful for loosening stubborn nails. Taking your time here ensures the boards remain intact and ready for use.

Sanding, Cleaning, and Finishing Techniques
Once the boards are disassembled, the next step is sanding. I use medium-grit sandpaper to smooth out rough edges and remove splinters. This not only makes the wood safer to handle but also prepares it for finishing touches. For larger projects, an electric sander can save time and effort.
Cleaning the wood is equally important. I wipe down each board with a damp cloth to remove dust and debris. For a deeper clean, a mild soap solution can be used. Let the wood dry completely before moving on to the next step.

Choosing the right finish can enhance the natural beauty of the wood. I often use a clear sealant to protect the boards while maintaining their rustic look. For a more polished appearance, a coat of paint or stain can be applied. Whatever finish you choose, make sure it complements your project’s overall design.
“Taking the time to prepare your materials properly ensures a smoother and more enjoyable DIY experience.”
By following these steps, you’ll transform raw pallet wood into a functional and stylish piece. Remember, the key to success lies in careful preparation and attention to detail. This will help you sell pallet woodworking projects to get more profit.
Innovative DIY Pallet Projects for the Home
Transforming pallet wood into home décor is a creative and budget-friendly way to upgrade your space. I’ve discovered that with a little imagination, you can turn simple materials into stunning pieces that reflect your personal style. These projects are not only economical but also quick to complete, often in just a day or two.
One of my favorite projects is creating a rustic bookshelf. Using a few boards and some basic tools, I designed a functional piece that adds charm to any room. Another idea is building a cozy outdoor bench. It’s perfect for relaxing in the garden or on the patio. The best part? These projects require minimal materials and effort.

| Project | Description |
|---|---|
| Wall Art | Use pallet boards to create unique wall designs or photo frames. |
| Storage Solutions | Build shelves, racks, or organizers for a clutter-free home. |
| Outdoor Seating | Construct benches or chairs for your garden or patio. |
| Decorative Accents | Make planters, signs, or holiday decorations. |
What I love most about these projects is their versatility. Whether you’re working on indoor furniture or outdoor decor, pallet wood adapts to your needs. With just a few tools and some creativity, you can create custom pieces that enhance your home.
“Creativity is seeing what others see and thinking what no one else has thought.”
Don’t be afraid to experiment with designs that suit your unique style. The possibilities are endless, and the results are always rewarding. So, grab your tools and start transforming your space today!
Creative Pallet Woodworking Ideas
The beauty of pallet wood lies in its ability to transform into almost anything you can imagine. From functional furniture to decorative accents, this material offers endless possibilities. I’ve found that with a little creativity, you can turn simple boards into stunning pieces that elevate your home.
One of my favorite aspects of working with pallet wood is its versatility. Whether you’re crafting a rustic shelf or a unique wall art piece, the process is both rewarding and fun. Each project allows you to experiment with designs that reflect your personal style.
List of Inspiring Projects
Here are some of my favorite ideas that showcase the potential of pallet wood:
- Wall Art: Use boards to create geometric designs or personalized photo frames.
- Rustic Shelves: Build floating shelves for a functional and stylish storage solution.
- Outdoor Bench: Construct a cozy seating area for your garden or patio.
- Planters: Design multi-tiered planters to showcase your favorite flowers or herbs.
Each of these projects can be tailored to match your home décor. For example, a rustic shelf can be stained for a natural look or painted to add a pop of color. The key is to plan your design carefully before starting.
| Project | Key Features |
|---|---|
| Wall Art | Customizable designs, perfect for personalization. |
| Rustic Shelves | Functional and stylish, ideal for small spaces. |
| Outdoor Bench | Durable and weather-resistant, great for gardens. |
| Planters | Versatile and space-saving, perfect for herbs or flowers. |
I always encourage experimenting with different techniques. For instance, combining pallet wood with other materials like metal or glass can create a unique look. The design process is just as important as the final piece, so take your time and enjoy the journey.
“Creativity is seeing what others see and thinking what no one else has thought.”
Whether you’re a beginner or an experienced DIY enthusiast, these projects are a great way to explore the potential of pallet wood. So, grab your tools, let your imagination run wild, and start creating something amazing today!
Outdoor Pallet Woodworking: Garden and Patio Ideas
Outdoor spaces can be transformed into cozy retreats with a few creative touches. I’ve found that using reclaimed materials like pallet wood adds both charm and functionality to gardens and patios. The natural weathered look of this material blends perfectly with outdoor environments, creating a rustic yet modern aesthetic.
One of my favorite projects is building planters. They’re practical, stylish, and bring greenery to any space. To start, I select sturdy boards and sand them to remove splinters. Then, I assemble the planks into a box shape, ensuring proper drainage by drilling holes in the bottom. This simple project can be completed in just a few hours.

Weather resistance is a key consideration for outdoor projects. I always use exterior-grade sealant or paint to protect the wood from moisture and UV rays. This step ensures your creations last for years, even in harsh conditions. For added durability, I recommend using heat-treated pallets marked with “HT” to avoid toxic chemicals.
Here are some ideas to inspire your next outdoor project:
| Project | Details |
|---|---|
| Vertical Planter | Maximize space by growing herbs or flowers vertically. |
| Patio Bench | Create a cozy seating area with a rustic design. |
| Garden Trellis | Support climbing plants like cucumbers or tomatoes. |
| Outdoor Table | Build a sturdy table for dining or entertaining. |
What I love most about these projects is their versatility. Whether you’re crafting a planter or a bench, each piece adds character to your outdoor space. The process is rewarding, and the results are always unique.
“The beauty of outdoor woodworking lies in its ability to blend functionality with nature’s charm.”
By incorporating pallet wood into your garden or patio, you can create a space that’s both stylish and sustainable. So, grab your tools and start transforming your outdoor area today!
Pallet Coffee Tables and Furniture Designs
Creating a coffee table from reclaimed materials is a rewarding way to blend functionality with creativity. I’ve found that using pallet wood allows for unique designs that are both stylish and sustainable. Whether you’re aiming for a rustic look or a modern minimalist aesthetic, the possibilities are endless.
Design Inspirations
When designing a coffee table, I like to draw inspiration from both rustic and modern styles. Combining the natural texture of pallet wood with clean lines creates a balanced look. For example, adding a glass top to a rugged wood base can give a contemporary feel while maintaining a touch of rustic charm.
Here are some design ideas to consider:
- Rustic Charm: Use weathered boards for a vintage, farmhouse look.
- Modern Minimalism: Sand the wood smooth and apply a clear sealant for a sleek finish.
- Industrial Edge: Incorporate metal accents like hairpin legs for an urban vibe.

Construction and Assembly Tips
Building a sturdy coffee table starts with selecting the right boards. I always look for dry, untreated wood that’s free from cracks or splinters. Once the materials are ready, I follow these steps:
- Disassemble Carefully: Use a prybar to remove nails without damaging the boards.
- Sand Thoroughly: Smooth all surfaces to prevent splinters and prepare for finishing.
- Assemble with Precision: Use screws or wood glue to ensure a stable structure.
To avoid common pitfalls, double-check measurements and ensure the table is level before finalizing the build. Adding casters or wheels can enhance mobility, while built-in storage compartments add functionality.
“A well-built coffee table is more than just furniture—it’s a statement piece that reflects your creativity and craftsmanship.”
By following these tips and letting your imagination guide you, you can transform simple pallet components into a beautiful, functional piece of furniture. Happy building!
Custom Pallet Board Creations and Decor
Custom décor made from pallet boards can add a unique touch to any home. I’ve transformed ordinary boards into creative artworks and functional furniture, and the process is both rewarding and inspiring. With a little effort, you can turn reclaimed materials into stunning pieces that reflect your personal style.
When designing these creations, I start by selecting the right boards. I look for sturdy, untreated wood that’s free from cracks or splinters. This ensures the final piece is both durable and safe to use. The key is to balance design and function, creating something that’s as practical as it is beautiful.
Sanding and finishing are crucial steps in achieving a polished look. I use medium-grit sandpaper to smooth rough edges and remove splinters. For a professional finish, I apply a clear sealant or a coat of paint, depending on the desired aesthetic. These techniques not only enhance the appearance but also protect the wood from wear and tear.
Here are some tips for creating custom décor:
- Plan Your Design: Sketch your ideas and measure carefully before starting.
- Choose Quality Materials: Select boards that are sturdy and free from damage.
- Focus on Details: Sand thoroughly and apply finishes for a polished look.
What I love most about these projects is their versatility. Whether you’re crafting a wall art piece or a functional furniture item, the possibilities are endless. Each creation is a reflection of your creativity and craftsmanship.
“Every board holds the potential to become something extraordinary. Embrace the process and let your imagination guide you.”
By repurposing pallet boards, you can create custom décor that’s both stylish and sustainable. So, grab your tools, unleash your creativity, and start transforming your space today!

How I Transformed Pallet Wood into Art
Transforming pallet wood into art has been one of the most fulfilling experiences of my life. Each project taught me something new, from patience to precision. I’ve learned that every piece of wood has its own character, and it’s up to me to bring that out.
One of the biggest lessons I’ve learned is to embrace challenges. Working with reclaimed materials isn’t always easy. Knots, cracks, and uneven surfaces can test your patience. But these imperfections often add unique charm to the final piece. I’ve found that using sharp tools and taking my time makes all the difference.
Handling each board with my own hands has made every project deeply personal. There’s something special about feeling the texture of the wood and seeing it transform under my touch. I’ve experimented with different techniques, from sanding to finishing, and each step has refined my skills.
“Every piece of wood has a story, and it’s my job to tell it through my work.”
I encourage anyone starting their own journey to push their creative boundaries. Don’t be afraid to try new designs or techniques. Each project is an opportunity to learn and grow. Whether it’s a simple wall art or a complex furniture piece, the process is just as rewarding as the result.
Here are some key takeaways from my experience:
- Embrace imperfections—they add character to your work.
- Use sharp tools to achieve clean, precise cuts.
- Experiment with finishes to enhance the natural beauty of the wood.
- Take your time—each step matters in creating a quality piece.
By approaching each project with curiosity and dedication, you can turn simple pallet wood into something truly extraordinary. Happy creating!
Practical Tips for Using Free and Salvaged Wood
Working with free and salvaged wood can be just as rewarding as using new materials, especially when you know how to prepare and maintain it. I’ve found that with a little effort, you can turn reclaimed pieces into stunning projects that are both functional and eco-friendly.
One of the first steps is sourcing quality wood. I often visit local businesses like nurseries, printing shops, and grocery stores. These places usually have a steady supply of pallets and are happy to give them away. Always inspect the wood for structural integrity and avoid pieces with stains or strong odors, as they may indicate chemical contamination.
Cleaning and reconditioning are crucial for longevity. I use a solution of equal parts bleach and water to disinfect the wood. After cleaning, I let it dry in a well-ventilated area to prevent warping. Sanding with coarse-grit sandpaper followed by finer grits ensures a smooth finish.
Here’s a quick guide to sourcing and preparing salvaged wood:
| Step | Details |
|---|---|
| Source Wood | Visit local businesses for free pallets and inspect for quality. |
| Clean Thoroughly | Use a bleach-water solution to disinfect and remove debris. |
| Sand and Finish | Smooth rough edges and apply a clear sealant for protection. |
Repurposing leftover wood is another great way to maximize materials. For example, I’ve turned scraps into pallet compost bins for my garden. This not only reduces waste but also adds functionality to my outdoor space.
“Every piece of salvaged wood has potential. With the right care, it can become something extraordinary.”
By following these tips, you can make the most of free and salvaged wood. Whether you’re building furniture or creating compost bins, the process is both sustainable and rewarding. So, start exploring the possibilities today!
Integrating Technology in Your Pallet Projects
Blending traditional craftsmanship with modern technology has revolutionized my approach to DIY projects. By incorporating digital tools and innovative techniques, I’ve been able to enhance both the precision and creativity of my builds. This fusion of old and new has opened up endless possibilities for transforming reclaimed materials into stunning pieces.
Modern Tools and Digital Design
One of the first steps in my process is using digital design software to plan my projects. Tools like SketchUp allow me to visualize the final product and make adjustments before I even touch the wood. This not only saves time but also ensures accuracy in measurements and cuts.
For smoothing rough edges, I rely on a high-quality sander. It’s a game-changer for achieving a professional finish. Pairing it with tech-enhanced tools like a laser level ensures every piece fits perfectly. These tools have made my builds more efficient and polished.
3D Printing for Custom Components
I’ve also experimented with 3D printing to create custom parts for my projects. Whether it’s decorative accents or functional hardware, this technology allows me to add unique touches that elevate the overall design. It’s amazing how a small 3D-printed detail can transform a simple piece into something extraordinary.
Joining an Online Community
Being part of an online community has been invaluable. Platforms like Reddit and Facebook groups are great for exchanging ideas, troubleshooting challenges, and finding inspiration. The support and feedback from fellow DIY enthusiasts have helped me grow and refine my skills.
Here’s a quick overview of the tools and techniques I use:
| Tool/Technique | Benefits |
|---|---|
| Digital Design Software | Accurate planning and visualization. |
| Sander | Smooth finish and professional results. |
| 3D Printing | Custom components for unique designs. |
| Online Community | Support, inspiration, and troubleshooting. |
“Technology doesn’t replace craftsmanship—it enhances it. Embracing new tools has brought a fresh perspective to my work.”
By integrating technology into my projects, I’ve been able to push the boundaries of what’s possible with reclaimed materials. Whether it’s using a sander for a flawless finish or designing custom parts with a 3D printer, these tools have transformed my creative process. So, don’t be afraid to explore new techniques and join a community of like-minded builders. The possibilities are endless!
Build Your Pallet Woodworking Project Today
Exploring the potential of reclaimed materials has opened up a world of creativity for me. Throughout this article, I’ve shared how versatile and rewarding it can be to transform simple boards into functional and beautiful pieces. From planning each project carefully to experimenting with different techniques, every step has been a learning experience.
One of the most valuable lessons I’ve learned is the importance of using the right tools and taking the time to prepare materials properly. Whether you’re building a rustic shelf or a modern accent piece, attention to detail makes all the difference. Don’t be afraid to try new methods—like blending traditional craftsmanship with modern technology—to create something truly unique.
If you’re ready to start your own journey, I encourage you to dive in. The process of turning reclaimed materials into a functional thing is both fulfilling and inspiring. Join the vibrant DIY community, share your creations, and keep pushing your creative boundaries. Happy building!
FAQ
What tools do I need to start a DIY project with salvaged wood?
You’ll need basic tools like a hammer, pry bar, saw, and sander. Safety gear, such as gloves and goggles, is also essential to protect yourself during the process.
How do I find good quality pallets for my projects?
Look for pallets marked with “HT” (heat-treated) for safety. Check local businesses, warehouses, or online community boards for free or low-cost options.
What’s the best way to prepare salvaged wood for use?
Start by disassembling the pallet carefully. Then, sand the boards to remove rough edges and splinters. Clean them thoroughly and apply a finish for a polished look.
Can I build furniture like a coffee table using salvaged wood?
Absolutely! With some creativity and basic tools, you can craft unique pieces like coffee tables, benches, or even garden planters.
Are there any safety tips I should follow when working with salvaged wood?
Always wear gloves and goggles to protect against splinters and dust. Ensure the wood is clean and free of harmful chemicals before starting your project.
What are some beginner-friendly projects I can try?
Start with simple projects like a planter box, wall shelf, or small compost bin. These are great for practicing your skills and building confidence.
How can I make my DIY creations more durable?
Use weather-resistant finishes for outdoor projects and reinforce joints with nails or screws. Proper sanding and sealing also help extend the life of your piece.
Can I incorporate technology into my salvaged wood projects?
Yes! You can use tools like 3D printers to create custom components or add LED lighting for a modern touch to your designs.
Where can I find inspiration for my next project?
Explore online communities, social media platforms, or DIY blogs for creative ideas. You’ll find endless inspiration for transforming salvaged wood into art.
What’s the best way to source free wood for my projects?
Check with local businesses, construction sites, or recycling centers. Many places are happy to give away pallets or scrap wood for free.