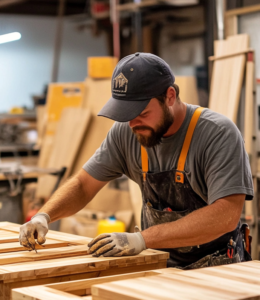
Did you know that the average cost of a high-end coffee table can exceed $2,700? That’s why I decided to take matters into my own hands and create my own. What started as a simple DIY project turned into a profitable venture, and I’m excited to share my coffee table woodworking plans with you.
Using beginner-friendly woodworking techniques, I transformed raw materials into stunning pieces that not only saved me money but also earned me a side income. The key? Detailed plans and a bit of creativity. Whether you’re a seasoned builder or just starting, this approach can work for you too.
In this article, I’ll walk you through the process, from selecting the right wood to executing the perfect design. My goal is to inspire you to take on your own project and discover the satisfaction of crafting something beautiful and functional.
Key Takeaways
- High-end coffee tables can cost thousands, but DIY projects are affordable and rewarding.
- Beginner-friendly plans make it easy to start your own project.
- Detailed designs and precise measurements are crucial for success.
- Using quality wood ensures durability and a professional finish.
- DIY projects can turn into a profitable side hustle with the right approach.

Introduction: My Coffee Table Woodworking Journey
My journey began with a simple idea: create something beautiful with my own hands. I wanted to add a personal touch to my living space, and that’s when I discovered the world of woodworking. What started as a small project quickly became a passion. You can also check out my end table wood plans to get more ideas.
My Inspiration and Background
I’ve always loved the idea of crafting something unique. When I moved into my new home, I wanted a piece that reflected my style. After browsing countless designs, I realized I could make it myself. It was intimidating at first, but I decided to dive in. My first attempt wasn’t perfect, but it taught me valuable lessons.
I experimented with different techniques and materials, learning as I went. The process was challenging but incredibly rewarding. Each step brought me closer to creating something I could be proud of. My confidence grew with every project, and soon, I was hooked on woodworking.
The Impact of Woodworking Plans on My Projects
One of the biggest game-changers for me was using detailed woodworking plans. These guides provided clear instructions and precise measurements, making the process much smoother. I no longer had to guess or improvise—everything was laid out step by step.
However, you can still inject creativity in this woodworking project. Just make sure to follow the steps to avoid making big mistakes.
Free plans and tutorials were especially helpful. They allowed me to explore different designs without breaking the bank. I learned the importance of joinery and how it can elevate the final product. With each project, I refined my skills and gained a deeper appreciation for the craft.
| Tool | Purpose |
|---|---|
| Impact Driver | Securing screws and bolts |
| Cabinet Saw | Precision cutting |
| Miter Saw | Angled cuts |
| Router | Shaping edges |
Choosing the right materials was also crucial. I learned that quality wood not only looks better but also ensures durability. Sanding and finishing became my favorite parts of the process, as they brought out the natural beauty of the wood.
Looking back, I’m amazed at how far I’ve come. What began as a simple DIY project has turned into a fulfilling side hustle. I hope my story inspires you to pick up a tool and start creating something of your own.

Understanding Coffee Table Woodworking Plans
Crafting furniture starts with a clear vision and the right guidance. For me, detailed plans were the foundation of every successful project. These blueprints provide step-by-step instructions, ensuring precision and consistency in every cut and joint.
What exactly are woodworking plans? They are comprehensive guides that include measurements, material lists, and assembly instructions. Whether you’re building a coffee table or a bookshelf, these plans eliminate guesswork and save time. They’re especially helpful for beginners, offering a roadmap to follow.

One of the most fascinating aspects of these designs is the terminology. Terms like “boat-shaped top” and “thumbnail profile” are common. A boat-shaped top refers to a gently curved surface, adding elegance to the piece. A thumbnail profile, on the other hand, softens the edges while maintaining a crisp, clean look.
Precision templates are another critical element. They ensure that every piece fits perfectly, resulting in a smooth finish. For example, Fine Woodworking emphasizes the importance of using templates for shaping curves. Similarly, Shanty2Chic highlights how templates can simplify complex designs.
As we move forward, expect to encounter more technical language. Terms like “through-tenons” and “angled braces” will become familiar. These concepts are essential for achieving structural stability and aesthetic appeal. With the right plan, even the most intricate designs become achievable.
Choosing Your Materials and Tools
The right materials and tools can make or break your project. Whether you’re a beginner or a seasoned enthusiast, having the essentials on hand ensures a smooth and enjoyable process. Let’s dive into what you’ll need to get started.
Essential Tools for Every Project
Every DIY project requires a few key tools. A router, for example, is perfect for shaping edges and creating clean curves. Flush-trimming bits help achieve precise cuts, ensuring your pieces fit together seamlessly.
Here’s a quick list of must-have tools:
| Tool | Purpose |
|---|---|
| Router | Shaping edges and curves |
| Flush-Trim Bit | Precision cutting |
| Clamps | Securing pieces during assembly |
| Orbital Sander | Smoothing surfaces |
Selecting Quality Wood and Hardware
Choosing the right wood is crucial for durability and aesthetics. Hardwoods like oak or maple are excellent choices for their strength and natural beauty. For hardware, opt for corrosion-resistant screws and hinges to ensure longevity.

“The quality of your materials directly impacts the final product. Invest in the best you can afford.”
Preparing a materials list is a critical step. It keeps you organized and ensures you have everything you need before starting. Include items like sandpaper (80, 120, and 220 grit), wood glue, and finish products like polyurethane.
With the right tools and materials, your project will not only look professional but also stand the test of time. Happy building!

Design Inspiration & Template Creation
Designing furniture is about blending creativity with precision. When I started my projects, I looked at existing designs for inspiration. It’s similar to how I got started with wine rack wood plans. But the real magic happened when I made them my own. Custom templates became my secret weapon for achieving unique results.
Custom Curves and Edge Details
One of my favorite techniques is using a bent strip of wood to create smooth curves. This method allows for endless design possibilities. For example, I once crafted a piece with a boat-shaped top, adding elegance to the living space.
Plywood templates and flush-trimming bits are essential for this process. They ensure every cut is precise, resulting in a professional finish. I learned this from professional examples, and it’s been a game-changer for my work.

Creating That Gentle Thumbnail Profile
Another detail I love is the thumbnail profile. It softens the edges while maintaining crisp lines. This subtle touch adds sophistication to any piece. I achieved this by carefully shaping the wood and sanding it to perfection.
Experimenting with edge treatments and color contrasts can elevate your design. Don’t be afraid to take risks. Customizing templates allows you to create something truly unique and reflective of your style.
“The beauty of DIY lies in making something uniquely yours.”
With the right tool and a bit of creativity, you can transform a simple project into a masterpiece. Start with a solid plan, and let your imagination guide you.
Step-by-Step Coffee Table Build Process
Building a piece of furniture from scratch is both challenging and rewarding. I’ll walk you through the process, from assembling the legs to adding the final touches. With clear instructions and a bit of patience, you’ll have a stunning coffee table in no time.
Leg Assembly and Tabletop Construction
Start by cutting the lumber to size. For the legs, I used 2×2 boards, ensuring each piece was 15 inches long. Clamp the pieces together and drill pocket holes using a 2 1/2-inch screw. Let the assembly sit for 24 hours to ensure a strong bond.
For the tabletop, I used 2×8 boards, cutting them to the desired length. Align the boards edge-to-edge and secure them with wood glue and clamps. Once dry, sand the surface smooth using 80-grit sandpaper.

Joinery and Attachment Techniques
Next, attach the legs to the tabletop. I used figure 8 fasteners, drilling ⅝-inch holes for installation. This method allows for wood movement while keeping the table stable. Secure the legs with ⅝-inch screws, ensuring everything is aligned perfectly.
For added strength, I reinforced the joints with angled braces. These braces not only improve stability but also add a touch of elegance to the design.
Finishing Touches and Sanding Tips
Once the assembly is complete, it’s time to focus on the finish. Start by sanding the entire piece with 220-grit sandpaper. This step removes any rough spots and prepares the surface for staining or painting.
Apply a clear polyurethane finish for durability and a professional look. I recommend using multiple coats, sanding lightly between each layer. This ensures a smooth, long-lasting finish.
“The details make the difference. Take your time with sanding and finishing—it’s worth it.”
Finally, inspect the table for any minor irregularities. Use a block plane or touch-up sanding to fix imperfections. Your DIY project is now complete and ready to enhance your living space.
Incorporating Modern & Rustic Elements
Combining modern and rustic styles can transform any space into a unique masterpiece. The challenge lies in balancing clean, contemporary lines with the warmth of natural textures. I’ve experimented with this blend in my own diy projects, and the results are stunning.

One of my favorite projects involved creating a coffee table that seamlessly merged both styles. I started with a free printable plan and customized it to include rustic wood elements and sleek metal accents. The key was ensuring that neither style overpowered the other.
Balancing Clean Lines with Rustic Charm
To achieve this balance, I focused on design elements like proportions and color. For example, I used reclaimed wood for the tabletop to add rustic charm. The legs were made of metal, providing a modern touch. This combination created a harmonious look that fit perfectly in my living room.
Here’s a quick list of tips to help you blend these styles:
- Use natural materials like wood and stone for rustic appeal.
- Incorporate sleek metals or glass for a modern edge.
- Stick to a neutral color palette to unify the design.
- Experiment with textures to add depth and interest.
Another step I took was adjusting the proportions. A bulky tabletop can feel too rustic, while thin legs might look too modern. Finding the right balance made all the difference.
| Element | Modern | Rustic |
|---|---|---|
| Material | Metal, Glass | Wood, Stone |
| Color | Neutral Tones | Earthy Shades |
| Texture | Smooth, Polished | Rough, Natural |
By carefully selecting and combining these elements, you can create a piece that stands out. Whether it’s a coffee table or another furniture item, the blend of modern and rustic styles will add character to your space.
“The beauty of design lies in the details. A thoughtful mix of styles can elevate any room.”
With these tips, you’re ready to tackle your own project. Start with a solid plan, and let your creativity guide you. The result will be a unique piece that reflects your personal style.
Expert Tips on Joinery and Tool Mastery
Mastering precision in woodworking starts with the right tools and techniques. Whether you’re a beginner or an experienced crafter, understanding how to optimize your tools and create strong joints is essential. These skills not only improve the quality of your work but also ensure your piece stands the test of time.
Optimizing Tools for Precision Cuts
Accurate cuts are the foundation of any successful project. I’ve found that using a router with a flush-trim bit ensures clean edges and perfect alignment. For straight cuts, a cabinet saw is invaluable. It provides the precision needed for complex designs.
Here’s a quick list of tips to optimize your tools:
- Keep blades sharp for cleaner cuts.
- Use clamps to secure materials during cutting.
- Measure twice, cut once—accuracy is key.
Small adjustments, like adjusting the fence on your saw, can make a big difference. These tweaks ensure every piece fits perfectly, reducing the need for rework.
Ensuring Structural Stability Through Joinery
Strong joints are crucial for durability. I often use angled braces to create structural triangles, which eliminate extra undercarriage clutter. This technique not only strengthens the design but also adds a sleek, modern look.
One of my favorite methods is through-tenons. They provide excellent stability and are perfect for larger projects. For smaller pieces, pocket screws work well. They’re easy to use and provide a secure hold.
“The right joinery technique can transform a fragile design into a sturdy masterpiece.”
Working in a tight space can be challenging, but it’s not impossible. I’ve learned to plan my cuts carefully and use compact tools. This approach minimizes errors and maximizes efficiency.
For beginners, start with simple joints like butt or miter joints. As you gain confidence, move on to more advanced techniques like dovetails or mortise and tenon. Each step builds your skills and enhances the quality of your work.
By mastering your tools and joinery, you’ll create pieces that are not only beautiful but also functional. These tips have helped me overcome countless challenges, and I’m confident they’ll do the same for you.
Utilizing Free Plans & Additional Resources
Free resources can make all the difference in your DIY journey. Whether you’re a beginner or an experienced crafter, there’s a wealth of information available to help you succeed. From printable plans to detailed video tutorials, these tools simplify the process and make it accessible to everyone.
Overview of Free Printable Plans
One of the best ways to start your project is with free printable plans. These guides provide step-by-step instructions, material lists, and precise measurements. Websites like Shanty2Chic offer a variety of designs, from modern to rustic styles, ensuring there’s something for every taste.
These plans are perfect for beginners because they eliminate guesswork. You’ll know exactly what materials to buy and how to assemble each piece. Plus, they’re free, making them a budget-friendly option for anyone looking to create a stunning product.
Video Tutorials and Detailed Guides
For those who prefer visual learning, video tutorials are a game-changer. Platforms like YouTube and dedicated woodworking sites offer hours of detailed instruction. These videos guide you through every step, from cutting the wood to applying the final finish.
One of my favorite series includes over 3 1/2 hours of content, broken into chapters like “Flattening the Top” and “Assembling the Frames.” These tutorials are especially helpful for mastering techniques like joinery and edge detailing.
“Video tutorials are like having a mentor by your side, guiding you through each step.”
In addition to videos, many sites provide comprehensive shopping lists and cut lists. These resources keep you organized and ensure you have everything you need before starting. Trusted sources like Shanty2Chic also offer downloadable plans, making it easy to follow along.
By leveraging these free resources, you can tackle even the most complex projects with confidence. Whether you’re building a coffee table or another piece of furniture, these tools will help you achieve professional results without breaking the bank.
Bringing Your Personal Touch to the Project
Personalizing your project is the key to making it truly yours. While generic plans provide a solid foundation, adapting them to fit your space and style ensures a perfect match. I’ve found that small tweaks can turn a standard design into something uniquely mine.
Adapting Designs to Fit Your Living Space
One of the first steps I take is measuring my space carefully. Even the best plan might need adjustments to fit perfectly. For example, I once reduced the width of a table to fit a cozy corner. This simple change made all the difference.
Here’s a quick list of tips for adapting designs:
- Measure your space before starting.
- Adjust dimensions to suit your needs.
- Experiment with color and finishes for a custom look.
Adding Decorative Touches
Details like edge treatments or unique hardware can elevate your project. I love using reclaimed wood for a rustic feel or adding metal accents for a modern edge. These small changes make the piece stand out.
“The beauty of DIY lies in making something uniquely yours.”
For beginners, start with simple modifications. As you gain confidence, you can tackle more complex changes. The end result will be a piece that reflects your personality and style.
| Design Element | Customization Idea |
|---|---|
| Tabletop | Use reclaimed wood or a unique finish. |
| Legs | Experiment with metal or tapered designs. |
| Hardware | Add decorative handles or accents. |
By taking the time to personalize your project, you’ll create something that’s not only functional but also a true reflection of your style. Happy building!
Build Your Wooden Coffee Table Today
Taking on a DIY project can be both rewarding and transformative. Through my journey, I’ve learned that success lies in attention to detail and using a comprehensive plan. These guides not only simplify the process but also ensure professional-quality results.
Embrace the challenge and enjoy the learning process. Every step, from selecting materials to applying the final finish, teaches valuable skills. Reflecting on my own experience, I’ve found that patience and creativity are key to turning an idea into a stunning coffee table.
Detailed steps and free resources make it easier than ever to achieve your goals. Whether you’re a beginner or an experienced crafter, these tools provide the support you need. I encourage you to start your own project and discover the joy of creating something uniquely yours.
As you reach the end of your journey, take pride in your accomplishment. Share your projects and experiences with others—it’s a great way to inspire and connect. Happy building!
FAQ
What inspired me to start woodworking?
I’ve always loved creating things with my hands. Seeing beautiful furniture in magazines sparked my interest in crafting my own pieces, especially for my living space.
How do I choose the right tools for my project?
Start with essentials like a saw, drill, and sander. Quality tools make a big difference in precision and ease. I recommend investing in durable brands like DeWalt or Bosch.
What type of wood works best for beginners?
Pine or poplar are great options. They’re affordable, easy to work with, and perfect for practicing cuts and joinery techniques.
How do I add a personal touch to my design?
Experiment with custom curves, edge details, or unique finishes. I often adapt templates to fit my style and the space I’m designing for.
Are free plans reliable for beginners?
Absolutely! Many free plans, like those from Ana White, are beginner-friendly. They often include step-by-step instructions and helpful tips.
What’s the best way to ensure structural stability?
Focus on strong joinery techniques like mortise and tenon or pocket screws. These methods keep your piece sturdy and long-lasting.
How do I balance modern and rustic elements?
Combine clean lines with natural textures. For example, pair a sleek tabletop with chunky, reclaimed wood legs for a balanced look.
What finishing techniques do you recommend?
Sand thoroughly for a smooth surface, then apply a stain or sealant. I prefer using Minwax products for a professional finish.
Where can I find video tutorials for guidance?
YouTube channels like Woodworking for Moms and DIY Creators offer detailed guides that are perfect for visual learners.
How do I adapt designs to fit my space?
Measure your area carefully and adjust dimensions in your plans. I always sketch out ideas first to ensure the piece complements my room.