Did you know that over 60% of DIY enthusiasts struggle with finding reliable plans for their projects? When I first started my journey into building, I faced the same challenge. That’s why I decided to create a guide that simplifies the process of using woodworking table plans.
This project begins with understanding the right materials. From construction-grade lumber to MDF, choosing the correct material is crucial. I’ve learned that precise measurements and a well-organized cut list can make all the difference in achieving professional results.
Whether you’re a beginner or an experienced builder, this guide is designed to help you create a functional workbench for your shop or garage. With clear instructions and step-by-step diagrams, you’ll have everything you need to get started.
Key Takeaways
- Choose the right materials, like construction-grade lumber or MDF, for durability.
- Precise measurements and a detailed cut list ensure accuracy.
- This guide is suitable for both beginners and experienced builders.
- Clear instructions and diagrams make the process straightforward.
- Build a functional workbench tailored to your shop or garage needs.

Introduction
Starting a DIY project can feel overwhelming, but having a clear plan makes all the difference. When I began my first workbench build, I quickly realized how crucial it is to set the stage with a solid introduction. It’s not just about gathering tools and materials—it’s about understanding the entire process from start to finish.
By the end of this guide, you’ll have a clear understanding of how to approach your workbench project. From gathering tools to final touches, every step is designed to make the process straightforward and rewarding. This also works with other projects, such as when using woodworking nightstand plans.
Why I Embraced DIY Woodworking Projects
Building my first workbench taught me the value of patience and precision. It wasn’t just about creating a functional piece; it was about the joy of working with my own hands. I quickly realized how rewarding it is to see a project come to life, one cut at a time.
Using simple yet effective plans made all the difference. They guided every measurement and ensured I stayed on track. I learned that a well-thought-out plan is the backbone of any successful build. It’s not just about the final product but the process of creating something unique.
One of the biggest benefits of DIY is the cost savings. By choosing construction-grade lumber and the right tools, I was able to build a sturdy workbench without breaking the bank. Plus, adding personal touches made it truly mine. Whether it’s a custom surface or an extra shelf, DIY allows for endless creativity.
Every project has taught me something new. From the importance of precise measurements to the patience required for detailed work, I’ve grown as a builder. It’s not just about the material or the tools—it’s about the lessons learned along the way.
| Key Benefits of DIY Woodworking | Why It Matters |
|---|---|
| Cost Savings | Using affordable materials reduces expenses. |
| Personalization | Custom features make the project unique. |
| Skill Development | Each project builds precision and creativity. |
| Satisfaction | Completing a project brings a sense of accomplishment. |
Embracing DIY has transformed my workshop and my mindset. It’s not just about building a workbench—it’s about creating something that reflects my vision and effort. Every step of the process has been a rewarding experience, and I can’t wait to tackle my next project.
Woodworking Table Plans: Essential Guide for DIYers
Creating a functional workspace starts with the right blueprint. For DIY enthusiasts, having a detailed plan is the foundation of any successful project. It ensures every step is clear, from measuring materials to assembling the final piece.
Free downloadable plans are a game-changer for intermediate woodworking ideas. They simplify complex builds by providing step-by-step instructions and precise cut lists. These resources save time and reduce errors, making even the most challenging projects manageable.

Not all plans are created equal. Some focus on basic designs, while others include advanced features like storage solutions or integrated tool spaces. Understanding the differences helps you choose the right one for your needs.
Detailed joinery diagrams are another essential part of a good plan. They ensure every part fits perfectly, resulting in a sturdy and durable workbench. Whether you’re building a simple table or a multi-functional addition to your shop, precision is key.
To help you compare, here’s a breakdown of popular plans and their features:
| Plan Type | Key Features | Best For |
|---|---|---|
| Basic Workbench | Simple design, minimal materials | Beginners or small spaces |
| Modular Workbench | Customizable sections, storage options | Advanced builders |
| Router Table Combo | Integrated router space, durable surface | Tool-heavy projects |
By following a well-designed plan, you can create a workbench that meets your needs and lasts for years. Whether you’re working in a garage or a dedicated room, the right blueprint makes all the difference.
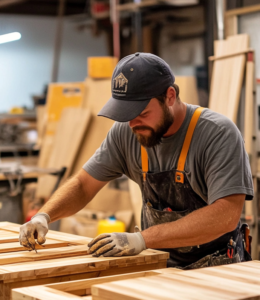
Gathering Your Materials and Tools
Selecting the right materials and tools is the first step to a successful project. When I built my first workbench, I quickly realized how crucial it is to have everything ready before starting. A detailed list of supplies ensures you won’t miss anything important.
Listing Construction Lumber and MDF Options
For the base of my workbench, I used kiln-dried 2x4s and 4x4s. These materials are sturdy and less likely to warp over time. For the top, I chose MDF panels because they provide a smooth and durable surface.
Always check the quality of your materials before buying. I take photos and compare samples to ensure consistency. This extra step saves you from issues later in the project.
Essential Hand and Power Tools
Having the right tools makes the job easier. My go-to items include a circular saw for precise cuts, a drill for assembling parts, and a router for finishing touches. A table saw is also helpful for larger projects.
Don’t forget basic hand tools like a tape measure, clamps, and a level. These ensure accuracy and stability during the build. With the right tools and materials, your workbench will be both functional and long-lasting.

Selecting the Right Lumber for Your Project
Choosing the right lumber can make or break your DIY project. The type of wood you select impacts the durability, appearance, and functionality of your workbench. Over time, I’ve learned that understanding the differences between construction-grade and premium materials is essential for a successful build.
Understanding Construction-Grade vs. Premium Materials
Construction-grade lumber, like SPF (spruce, pine, fir), is affordable and widely available. It’s perfect for structural parts of your workbench. However, it may have knots or imperfections that affect its strength. For the top or visible parts, I often opt for premium hardwoods like maple or oak. These materials are more expensive but offer a smoother surface and better aesthetics.
“The quality of your lumber directly influences the longevity of your project. Always inspect each board for flaws before making a purchase.”
Kiln-dried lumber is my go-to choice. It’s less likely to warp or shrink over time, ensuring your workbench remains stable. When selecting wood, I always examine each board for cracks, splits, or warping. This extra step saves time and frustration later in the project.
Here’s a quick comparison to help you decide:
| Type of Lumber | Pros | Cons |
|---|---|---|
| Construction-Grade (SPF) | Affordable, widely available | May have knots or imperfections |
| Premium Hardwood (Maple, Oak) | Durable, smooth surface | More expensive |
Whether you’re building in your shop or garage, selecting the right material ensures your workbench will stand the test of time. Take the time to choose wisely, and your project will yield professional results.
Essential Tools for a DIY Workbench Build
Having the right tools at your disposal can transform a challenging project into a smooth and enjoyable experience. When I built my first workbench, I quickly realized how crucial it is to have the proper equipment. From hand tools to power tools, each plays a vital role in ensuring precision and efficiency.

Drill Guides, Saws, and Routers
A quality drill guide, like the Wolfcraft model, is indispensable for making accurate holes. I’ve found that using the right tool for each step ensures clean and precise results. A circular saw with sharp blades is another must-have for cutting lumber to size.
Routers are excellent for adding finishing touches. Whether you’re rounding edges or creating grooves, a router gives your workbench a polished look. Always test settings on scrap material before working on the actual project to avoid mistakes.
Using Jigs and Fixtures for Accuracy
Jigs and fixtures are game-changers for achieving consistent results. I use them to ensure every cut and hole is perfectly aligned. They’re especially helpful when working on repetitive tasks, like drilling multiple dowel holes.

One of my favorite jigs is a simple crosscut sled for my table saw. It makes cutting large pieces of wood safer and more accurate. Investing time in setting up these aids pays off in the long run.
“Using the right tools not only saves time but also ensures a professional finish. Always test your setup before committing to the final piece.”
Here’s a quick list of essential tools for your workbench build:
- Drill guide for precise holes
- Circular saw with sharp blades
- Router for finishing touches
- Jigs and fixtures for accuracy
- Clamps for holding pieces in place
By equipping yourself with these tools, you’ll be ready to tackle any project with confidence. Whether you’re working in your shop or garage, the right tools make all the difference.
Precise Cutting and Measurement Techniques
Accuracy in cutting and measuring is the backbone of any successful DIY project. When I built my first workbench, I quickly learned that even the smallest error can lead to big problems. Taking the time to measure carefully and cut precisely ensures every part fits perfectly.
Measuring for Perfection
I always start by double-checking my measurements. Using a tape measure and a sharp pencil, I mark each board carefully. I’ve found that cutting to the outside of the line helps avoid removing too much material. This extra step ensures a snug fit during assembly.
For critical cuts, I use a combination square to verify angles. This tool helps me maintain straight lines and 90-degree corners. Taking these precautions saves time later by reducing the need for adjustments.
Making Rough and Final Cuts
Before making the final cut, I always start with a rough cut. This allows me to trim the board to the exact size needed. I use a circular saw for rough cuts and a table saw for precise finishing. Clamping the board securely prevents movement and ensures a clean cut.
When cutting multiple pieces, I clamp them together to ensure uniformity. This technique is especially useful for legs or stretchers that need to match perfectly. It’s a small step that makes a big difference in the final result.
“Precision in cutting isn’t just about accuracy—it’s about creating a sturdy and professional workbench that lasts.”
Here’s a quick comparison of rough vs. final cuts:
| Type of Cut | Purpose | Tools Used |
|---|---|---|
| Rough Cut | Remove excess material | Circular saw, jigsaw |
| Final Cut | Achieve precise dimensions | Table saw, miter saw |
By following these techniques, you’ll create a workbench that’s both functional and professional. Whether you’re working in your shop or garage, precision is key to a successful project.
Building the Base: Cutting Parts to Length
The foundation of any sturdy workbench lies in the precision of its base. When I started this project, I knew that accurate cuts were essential. The first step was marking and cutting the 4×4 legs and 2×4 stretchers to the required lengths.

To ensure uniformity, I clamped multiple pieces together before cutting. This method saved time and guaranteed that all parts were the same length. I always leave a little extra for rough cuts, then trim to the final dimensions for precision.
Specific measurements are crucial for stability. For example, I adjusted the leg lengths to accommodate levelers. This small detail ensures the workbench sits perfectly flat, even on uneven surfaces. Clean, square cuts are the backbone of a durable base.
“Taking the time to measure twice and cut once ensures a professional result. Accuracy in this step sets the tone for the entire project.”
Here’s a quick guide to the measurements I used:
- Legs: 4×4 cut to 34 inches (adjusted for levelers)
- Stretchers: 2×4 cut to 30 inches
- Cross supports: 2×4 cut to 24 inches
By following these instructions, you’ll create a solid foundation for your workbench. Whether you’re working in your shop or room, these steps ensure a stable and long-lasting build.
Routing Grooves and Installing Threaded Rods
Routing grooves and installing threaded rods is a critical step in building a sturdy workbench. When I tackled this part of my project, I quickly realized how important it is to get the details right. The grooves serve as channels for the rods, ensuring the components stay securely connected.
Before diving into the final cuts, I always make practice cuts on scrap material. This helps me test the router settings and ensure everything is aligned correctly. It’s a small step that prevents costly mistakes later in the project.
Router Settings and Practice Cuts
Setting up the router correctly is essential for clean and precise grooves. I use a 3/8″ bit and adjust the depth incrementally to avoid overcutting. For the first pass, I set the bit to 1/4″ depth, then make a second pass to reach the full 3/8″ depth. This approach ensures smooth and accurate results.
Using an edge guide is another trick I’ve learned. It keeps the router steady and ensures the grooves are straight. I also clamp the workbench components securely to prevent movement during routing. Stability is key to achieving professional-quality results.
“Taking the time to test your setup on scrap material saves you from costly errors. Precision in routing ensures a sturdy and durable workbench.”
Here’s a quick guide to router bit depths and their applications:
| Bit Depth | Purpose |
|---|---|
| 1/4″ | Initial pass for shallow grooves |
| 3/8″ | Final depth for threaded rod channels |
By following these instructions, you’ll create clean and functional grooves for your workbench. Whether you’re working in your shop or garage, these steps ensure a stable and long-lasting build.
Sanding, Finishing, and Prepping Your Workbench
Achieving a smooth finish on all wood surfaces is essential for a professional-looking result. When I sanded my workbench, I used both a belt sander and a random orbital sander. These tools helped me remove imperfections and create a polished surface.

I started with coarse grit sandpaper, around 80 grit, to tackle rough spots. Gradually, I moved to finer grits like 120 and 220. This progression ensures the wood is smooth and ready for finishing. Skipping grits can leave scratches, so patience is key.
Cleaning off dust is a critical step before applying any finish. I used a tack cloth to remove all particles from the surface. This ensures the finish adheres properly and looks flawless. A well-sanded workbench not only looks great but also lasts longer.
“Taking the time to sand thoroughly pays off in the final look and durability of your project. Rushing this step can lead to disappointing results.”
Here’s a quick guide to my sanding process:
- Start with 80 grit to remove rough spots.
- Move to 120 grit for a smoother finish.
- Finish with 220 grit for a polished surface.
- Clean thoroughly with a tack cloth before applying finish.
By following these instructions, you’ll create a workbench that’s both functional and beautiful. Whether you’re working in your shop or garage, a well-sanded top makes all the difference.
Creating Trestle Rod Holes for Stability
Ensuring stability in your workbench requires precise placement of trestle rod holes. When I tackled this part of my project, I knew accuracy was key. Using dowel centers, I marked the exact locations for each hole, ensuring they aligned perfectly with the grooves.
Drilling through the wooden parts carefully is essential. I used brad-point bits to maintain clean and straight holes. This step ensures the threaded rods pass through smoothly, adding strength to the workbench.
Countersinking the holes was the next step. I chose Forstner bits to create recesses for nuts and washers. This technique ensures they sit flush with the wood, providing a clean and professional finish.
“Precision in drilling and countersinking ensures the workbench remains sturdy and stable. Take your time to get it right.”
Here’s a quick guide to the tools I used:
- Dowel centers for accurate marking
- Brad-point bits for clean drilling
- Forstner bits for countersinking
By following these instructions, you’ll create a workbench that’s both functional and durable. Whether you’re working in your shop or garage, these steps ensure a stable and long-lasting build.
Drilling Dowel Holes and Matching Parts
Drilling dowel holes might seem like a small task, but it’s a critical step in ensuring your workbench’s stability. When I worked on this part of my project, I realized how precision here impacts the entire build. Using threaded rods and dowel centers made the process smoother and more accurate.

Aligning for Accuracy with Dowel Centers
To mark the dowel holes, I used threaded rods as a positioning guide. This method ensures the holes on the legs and short stretchers align perfectly. Dowel centers were then inserted to transfer the exact locations to the matching parts.
Drilling the holes requires patience and precision. I used brad-point bits for clean, straight holes. This ensures the dowels fit snugly, creating firm and reliable joints. Taking the time to drill carefully pays off in the long run.
“Accuracy in drilling isn’t just about alignment—it’s about building a workbench that lasts. Every hole matters.”
Here’s a quick guide to the process:
- Use threaded rods to mark hole locations.
- Insert dowel centers to transfer marks to matching parts.
- Drill with brad-point bits for clean, precise holes.
- Double-check alignment before final assembly.
This step, though time-consuming, significantly improves the workbench’s structural accuracy. Proper alignment of dowel holes is essential for stability and durability. Whether you’re working in your shop or garage, these instructions ensure a professional result.
Implementing DIY Cutting Guide Strategies
Precision in cutting is the cornerstone of any successful DIY build. When I started working on my workbench, I realized how crucial it is to have reliable cutting guides. They ensure every cut is straight and accurate, saving time and reducing errors.
Constructing Reliable Cutting Guides
I built a two-piece cutting guide using thin hardboard and plywood. This setup ensures the saw follows a straight path, even for long cuts. Clamping the guide securely is essential to prevent movement during use.
Custom guides improve precision for both rough and final cuts. I tested the guide on scrap material first to ensure it worked perfectly. This small step prevents mistakes on the actual workbench components.
Maintaining Safety During Cuts
Safety is a top priority when using cutting guides. I always double-check that the saw’s shoe is aligned with the guide. Proper clamping ensures the guide stays in place, reducing the risk of accidents.
“Taking the time to set up your cutting guide correctly ensures both precision and safety. A well-made guide is a simple yet powerful solution for any DIY project.”
Here are a few tips I’ve learned for safe and accurate cutting:
- Use clamps to secure the guide firmly to the workbench.
- Adjust the saw’s motor overhang to avoid interference with the guide.
- Test the guide on scrap material before making final cuts.
By following these instructions, you’ll create clean, precise cuts every time. Whether you’re working in your shop or garage, a reliable cutting guide makes all the difference.
Utilizing Advanced Techniques for Customization
Customizing your workbench can transform it from a basic tool to a highly functional workspace. By adding features like storage solutions, shelves, and drawers, you can significantly enhance its usability. These upgrades not only provide extra space but also improve your overall workflow.
Adding Storage Solutions, Shelves, and Drawers
One of the best ways to maximize your workbench’s functionality is by integrating storage options. I added a set of drawers underneath the surface to keep tools and materials organized. This small change made a big difference in keeping my shop clutter-free.
Shelves are another great addition. I installed a couple above the workbench to store frequently used items. This setup ensures everything is within reach, saving time during projects. For larger tools, I used a modular system that allows me to adjust the layout as needed.
Integrating Power Tools for Enhanced Precision
Incorporating power tools into your workbench can take your projects to the next level. I added a router lift plate to my setup, which allows for precise cuts and finishes. This feature has been a game-changer for detailed work.
Another upgrade I made was installing T-Track systems. These tracks let me quickly attach clamps and guides, improving accuracy and efficiency. If you’re looking to expand your workbench’s capabilities, these advanced techniques are worth considering.
“Customizing your workbench isn’t just about adding features—it’s about creating a workspace that works for you. Every upgrade enhances both functionality and efficiency.”
Here’s a quick list of customization ideas to inspire your next project:
- Add drawers for tool organization.
- Install shelves for extra storage.
- Integrate a router lift plate for precision.
- Use T-Track systems for versatility.
By implementing these advanced techniques, you can turn a basic workbench into a highly customized and efficient workspace. Whether you’re working in your shop or garage, these upgrades will make a noticeable difference.
Budgeting, Time Management, and Material Cost Insights
Effective budgeting and time management are the keys to a successful DIY build. When I started my workbench project, I quickly realized how important it is to plan ahead. Breaking down costs and scheduling each step ensures a smooth process and a satisfying result.
I always begin by outlining expected material costs. Construction-grade lumber is a great option for affordability, but I also consider quality investments for critical parts like the top. Balancing price and durability helps me stay within budget without compromising on the final product.
Time management is equally crucial. I divide the project into phases—cutting, assembling, and finishing—and set realistic deadlines for each. This approach keeps me on track and prevents last-minute rushes. Allocating extra time for unexpected challenges is a tip I’ve learned the hard way.
Here are some cost-saving strategies I’ve found helpful:
| Strategy | Benefit |
|---|---|
| Buy in bulk | Reduces per-unit cost of materials |
| Use scrap wood | Minimizes waste and saves money |
| Compare suppliers | Ensures the best price for quality materials |
Finding cost-effective materials is another priority. I often visit local lumberyards to compare prices and quality. Negotiating with suppliers can lead to significant savings, especially for larger projects. Avoiding unnecessary waste by planning cuts carefully also helps stretch the budget.
“Proper budgeting and scheduling not only save money but also enhance the overall satisfaction of your project. Every step counts.”
Balancing affordability with quality is essential, especially when purchasing tools and bits. I invest in durable tools that last longer, even if they cost more upfront. This approach saves money in the long run and ensures better results for every project.
By focusing on these strategies, I’ve been able to create a functional workbench without overspending. Whether you’re working in your shop or garage, proper planning and budgeting make all the difference.
Customer Reviews and Product Choice Options
When I first considered upgrading my workspace, I was overwhelmed by the options available. After researching, I found the Ultimate Workbench / Outfeed Table Plan to be a standout choice. With over 1000 positive reviews, it’s clear this product delivers on its promises.
Customers rave about its features, like the extensive storage options and integrated dust extraction system. The 8′ x 4′ work surface is perfect for larger projects, making it a versatile addition to any shop or garage. Many reviewers also appreciate the detailed instructions, which make assembly straightforward even for beginners.
What Makes This Plan Stand Out?
The Ultimate Workbench isn’t just a workspace—it’s a complete solution. Here are some key features that set it apart:
- Ample storage with built-in drawers and shelves.
- Integrated dust extraction for a cleaner work environment.
- A durable top designed to handle heavy use.
- Customizable options to fit your specific needs.
One reviewer shared, “This workbench transformed my garage into a functional workshop. The storage solutions are a game-changer, and the dust extraction keeps everything clean.”
Product Options and Bundles
In addition to the plans, there are branded items like the John Malecki Logo Hat and Shut Up and Work T-Shirt. These add a personal touch to your workspace while supporting the brand. Bundles are also available, offering great value for those looking to get everything they need in one purchase.
“The bundle was the best decision I made. It saved me time and money, and the quality is unmatched.” – Satisfied Customer
After reviewing customer feedback, I decided to invest in this plan for my own shop. The positive reviews and detailed features made it an easy choice. If you’re looking for a reliable and efficient workbench, this is a product worth considering.
Build Your Woodworking Table Today
Completing a DIY project like a workbench brings a sense of accomplishment and pride. From selecting materials to adding final touches, every step builds confidence and skills. This guide has walked you through the process, ensuring you can create a functional and durable piece for your shop or garage.
Customizing your workbench with storage solutions or advanced features can transform it into a versatile workspace. These additions not only improve efficiency but also make your projects more enjoyable. I’ve found that taking the time to personalize my setup has made a significant difference in my workflow.
I encourage you to apply these methods in your own space. Whether you’re a beginner or an experienced builder, the satisfaction of creating something with your own hands is unmatched. Share your experiences and feedback—it’s all part of the continuous learning journey in DIY building.
FAQ
What materials do I need for a DIY workbench?
You’ll need construction lumber or MDF for the main structure. I also recommend using premium materials for durability if your budget allows.
Which tools are essential for building a workbench?
A drill, saw, and router are must-haves. I also suggest using jigs and fixtures to ensure accuracy during the build.
How do I choose the right lumber for my project?
Construction-grade lumber is cost-effective, but premium materials offer better quality. I always weigh durability against my budget before deciding.
What’s the best way to ensure precise cuts?
I use a reliable cutting guide and take my time with measurements. Practicing on scrap material helps me perfect my technique before making final cuts.
How do I add storage to my workbench?
I integrate shelves and drawers into the design. This keeps my tools organized and maximizes the workspace.
Can I customize my workbench for specific needs?
Absolutely! I’ve added features like power tool integration and adjustable shelves to make my workbench more versatile.
How long does it take to build a workbench?
It depends on the complexity, but I usually set aside a weekend for the project. Planning ahead helps me stay on track.
What’s the best way to finish my workbench?
I sand the surface thoroughly and apply a protective finish. This not only enhances the look but also extends the life of the bench.
Are there budget-friendly options for building a workbench?
Yes! I often use construction-grade lumber and repurpose materials to keep costs low without sacrificing functionality.
How do I ensure stability in my workbench?
I use trestle rods and dowel holes to reinforce the structure. Proper alignment during assembly is key to a sturdy result.