Did you know that over 60% of homeowners in the U.S. have tried at least one DIY project in the past year? Woodworking is a great way to add a personal touch to your home while saving money. I’ve been exploring basic woodworking projects for years, and I’m excited to share some of my favorite ideas with you today.
Whether you’re a beginner or just looking for a quick weekend activity, this guide covers a variety of easy-to make pieces. From a simple picture frame to a functional shelf, each project is designed to help you get started with minimal tools and effort. You’ll also find practical tips from trusted sources like Family Handyman and Kreg Tool to make the process smoother.
Woodworking doesn’t have to be complicated. With a bit of creativity and the right plan, you can create something beautiful for your home in no time. Let’s dive in and explore these fun and rewarding ideas together!
Key Takeaways
- Woodworking is a budget-friendly way to personalize your home.
- Start with simple projects like cutting boards or picture frames.
- Minimal tools are needed to get started.
- Trusted sources provide helpful tips for beginners.
- Each project is designed to be quick and easy to complete.

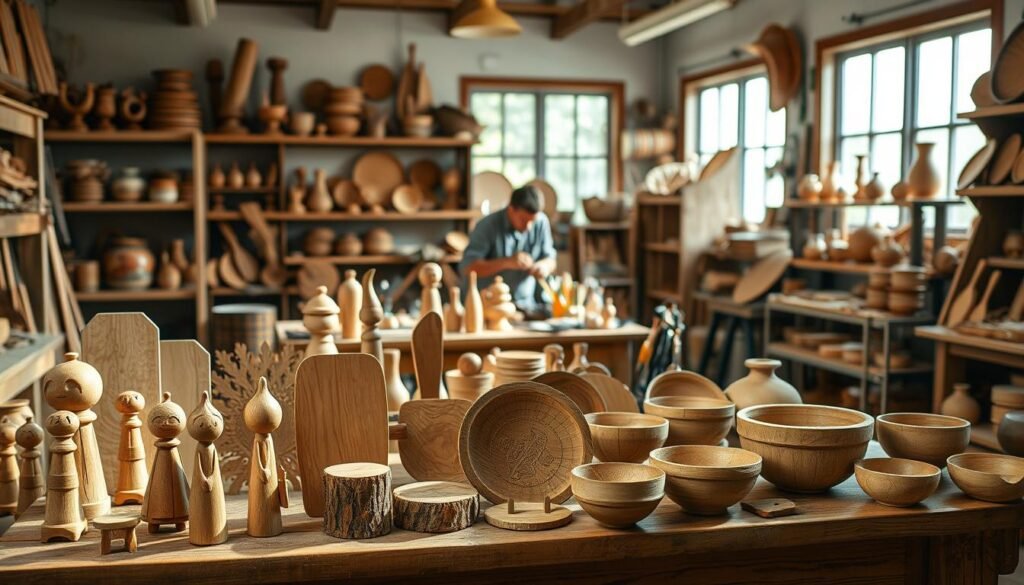
My Woodworking Journey: An Introduction
My journey into crafting with wood began with a simple idea and a lot of curiosity. I wanted to create something for my home that felt personal and unique. Starting with a few basic tools, I quickly realized how rewarding this craft could be.
At first, I made mistakes. My first piece was created with coffee table woodworking plans, but it taught me valuable lessons. Embracing these errors helped me grow and improve my skills. Every project, no matter how small, added to my confidence.
One of my early successes was a picture frame. It was a simple design, but it transformed a blank wall into a focal point. This small victory encouraged me to tackle more complex ideas, like a storage box for my room.
I relied on trusted resources like Kreg Tool and Family Handyman to guide me. Their tips made the process smoother and more enjoyable. If you’re just starting, I recommend choosing a beginner project that excites you. It’s a great way to learn while creating something useful.
Here’s a quick look at some of my favorite beginner-friendly ideas:
| Project | Tools Needed | Time Required |
|---|---|---|
| Picture Frame | Saw, Sandpaper, Glue | 2 hours |
| Wall Shelf | Drill, Level, Screws | 3 hours |
| Storage Box | Hammer, Nails, Wood | 4 hours |
Woodworking has become a great way for me to unwind and express creativity. If you’re just starting, remember that every step is part of the journey. With practice, you’ll see your skills grow and your space transform.
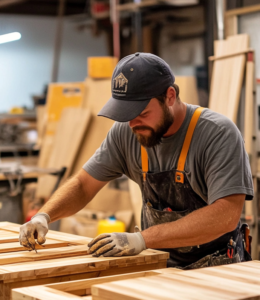
Getting Started with Essential Tools and Safety
Starting your DIY journey with the right tools and safety measures can make all the difference. Whether you’re building a shelf or crafting a picture frame, having the right equipment ensures your project turns out just the way you envisioned. Let’s explore the must-have tools and safety tips to help you get started confidently.
My Must-Have Tools
Every beginner’s workshop should have a few essential tools. This is especially true if you want to make money with woodworking. Here’s my top list:
- Saw: A jigsaw or power saw is perfect for cutting wood to size.
- Drill: Essential for creating holes and assembling pieces.
- Measuring Tools: A tape measure and 6″ rule ensure accuracy.
- Clamps: Keep boards secure during glue-up to avoid mistakes.
- Sandpaper: Smooth rough edges for a polished finish.
These tools are a great way to tackle most beginner-friendly ideas without breaking the bank.
Workshop Safety Tips
Safety is just as important as having the right tools. Here are some tips to keep your workspace safe:
- Wear Protective Gear: Safety glasses and gloves are a must.
- Proper Lighting: Ensure your workspace is well-lit to avoid accidents.
- Tool Maintenance: Keep tools sharp and clean for better performance.
- Clamp Boards: Secure wood pieces to prevent slipping during cuts.
- Dust Control: Use a dust mask or respirator to protect your lungs.
Setting aside a dedicated space at home for your DIY work can also make the process smoother and more enjoyable.
With the right tools and safety practices, you’ll be ready to tackle any beginner project with confidence. Remember, every step is part of the learning journey, so take your time and enjoy the process!

Exploring Basic Woodworking Projects for Beginners
Exploring simple DIY ideas can spark creativity and transform your space. Starting with small, manageable tasks is a great way to build confidence and develop new skills. Whether you’re crafting a decorative piece or a functional item, each project offers a chance to learn and grow.
One of my favorite beginner-friendly ideas is building a shelf. It’s practical, easy to customize, and perfect for organizing any room. Another fun option is creating a storage box, which can be used for toys, tools, or even as a decorative accent. These projects require minimal tools and can be completed in just a few hours.
If you’re looking for something smaller, try making a picture frame. It’s a simple yet rewarding task that adds a personal touch to your home. Each of these ideas is designed to help you get started with confidence, even if you’re new to DIY.
Here’s a quick look at some beginner-friendly projects:
- Shelf: Organize your space with a custom-built shelf.
- Storage Box: Keep your items tidy and accessible.
- Picture Frame: Showcase your favorite memories in style.
Every project you tackle will enhance your skills and understanding of the process. Don’t be afraid to experiment and adapt ideas to suit your needs. With each step, you’ll gain more confidence and discover new ways to express your creativity.
Starting with simple tasks is a great way to dive into the world of DIY. Whether you’re building a shelf, a box, or a frame, each project brings you one step closer to mastering the craft. So grab your tools, pick an idea, and let your creativity shine!
Step-by-Step Guide to Cutting Boards and Picture Frames
Creating a cutting board or picture frame is a rewarding project that combines functionality and creativity. These ideas are perfect for beginners and can be one of the easier woodworking projects to sell. Let’s dive into the process and explore how to bring these designs to life.
Planning Your Design
Start by sketching your design on paper. For a cutting board, consider the size and shape that fits your kitchen needs. A rectangular or square board is a classic choice. For a picture frame, measure your photo or artwork to ensure a perfect fit.
Choose the right type of wood. Hardwoods like maple or walnut are ideal for cutting boards due to their durability. For frames, lighter woods like pine or oak work well. Always select wood that complements your design and intended use.
Dry-Fit Techniques and Glue-Up Tips
Before applying glue, dry-fit all pieces to ensure they align correctly. This step is crucial for both cutting boards and picture frames. For frames, use a miter clamp to hold the corners at a precise 45° angle. This ensures a clean, professional finish.
When gluing, use water-resistant wood glue for cutting boards to prevent damage from moisture. Apply the glue evenly and clamp the pieces together tightly. For frames, add splines for extra stability. This technique ensures your project lasts for years.
Here are some tips to keep in mind:
- Use a framing square to check for accuracy during dry-fitting.
- Keep the board or frame even during glue-up to reduce sanding later.
- Allow the glue to dry completely before moving to the next step.
Taking your time with each step ensures a polished final piece. Whether it’s a cutting board or a picture frame, these projects are a great way to practice your skills and create something beautiful for your home.
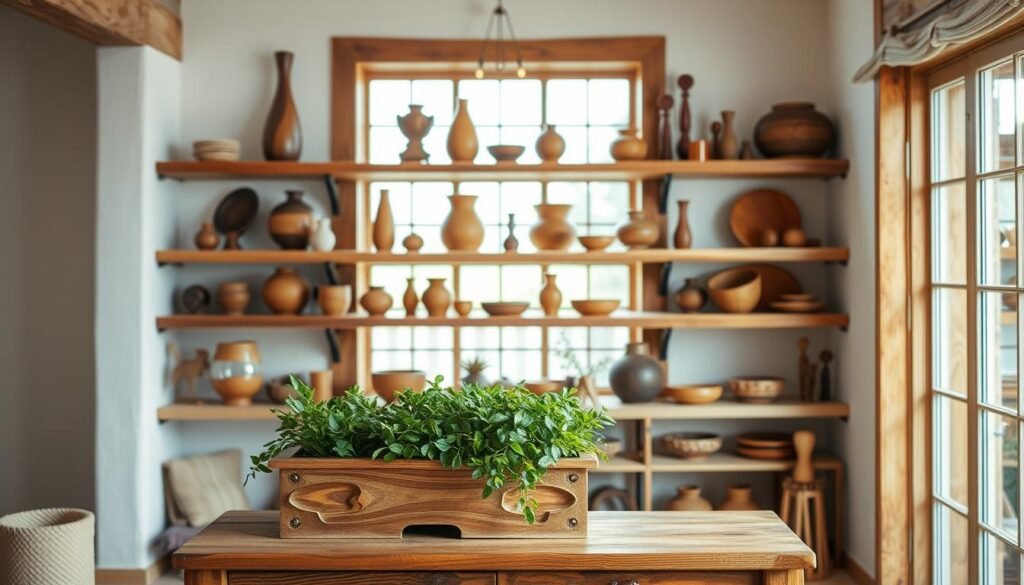
DIY Home Storage Solutions: Shelves, Bins, and More
Transform your living space with functional and stylish DIY storage solutions. Whether you’re looking to organize magazines or add rustic charm to your room, these ideas are both practical and decorative. Let’s dive into two of my favorite projects: magazine storage bins and rustic shelves.
Building Magazine Storage and Rustic Shelves
Magazine storage bins are a great way to keep your papers tidy while adding a personal touch to your space. I used 1/2-inch plywood for durability and cut it into five pieces per bin. The process involves sanding all edges and corners for a smooth finish. A Forstner bit helped me create clean handle holes for easy lifting.

For the rustic shelves, I opted for 1x4s to achieve a charming, farmhouse look. These shelves are perfect for displaying books, plants, or decorative items. I used a table saw to cut the wood and a random orbit sander for finishing. The result is a sturdy, stylish addition to any room.
Here are some tips to keep in mind:
- Measure your space carefully to ensure the bins or shelves fit perfectly.
- Use water-resistant wood glue for long-lasting durability.
- Apply multiple coats of paint or a clear polyurethane finish for protection.
These DIY storage projects are a great way to repurpose scrap wood and add functionality to your home. With a bit of creativity, you can adapt these designs to suit your décor and storage needs. So grab your tools and start building!
Creating a Functional Entryway with Coat Racks and Shoe Organizers
An organized entryway can set the tone for the rest of your home. It’s the first space you see when you walk in, and keeping it clutter-free makes a big difference. I’ve found that simple DIY solutions like coat racks and shoe organizers can transform this area into a functional and stylish place.
Simple Wall-Mounted Ideas
Wall-mounted solutions are a great way to maximize vertical space. I recently built a coat and hat rack using a 6 ft. 1×4 board. This project is perfect for families, as it keeps coats and accessories neatly organized. I placed the hooks 9 inches down from the top for easy access.
For shoes, I installed a simple wall-mounted shelf. This keeps pairs off the floor and adds a clean look to the entryway. Using ¾-inch plywood, I created a sturdy shelf that can hold multiple pairs. Here’s a quick breakdown of the materials I used:
| Material | Purpose |
|---|---|
| 1×4 board | Coat rack base |
| ¾-inch plywood | Shoe shelf |
| Hooks | For coats and hats |
Utilizing Behind-the-Door Space
Behind-the-door storage is another great way to add functionality without taking up extra space. I installed a set of removable shelves using 1.5-inch nails. These shelves are perfect for storing smaller items like gloves, scarves, or even cleaning supplies.
To ensure easy access, I drilled ¾-inch holes in the shelves. This allows me to lift them out when needed. I also added a coat rack hooks on the door itself, which is ideal for lightweight jackets or bags.
Here are some tips to keep in mind:
- Measure your door opening to ensure the shelves fit comfortably.
- Use water-resistant materials for durability.
- Secure all mounts properly to prevent accidents.
These DIY solutions are a great way to reduce clutter and add charm to your entryway. With a bit of creativity, you can customize these ideas to match your home’s décor. So grab your tools and start organizing!
Designing Custom Furniture: Benches and Tables
Designing custom furniture allows you to create pieces that are both functional and uniquely yours. One of my favorite projects is building a budget-friendly bench. It’s a simple yet rewarding task that can transform any space in your home.
Building a Budget-Friendly Bench
I recently built a bench inspired by Aldo Leopold’s classic design. Using just two boards and 18 screws, this project is perfect for beginners. Here’s how I did it:
- Measure and Cut: Start by measuring the wood to fit your desired bench size. I used recycled wood to save costs.
- Assemble the Base: Pre-drill holes and use screws to secure the legs and supports. This ensures stability.
- Add the Top: Attach the bench top using screws, making sure it’s evenly aligned.
For a polished finish, I sanded the bench with an orbital sander and applied outdoor oil-based polyurethane. This protects the wood and enhances its durability.
Here are some practical tips to keep in mind:
- Use a wood router with a round-over bit to smooth the edges for added comfort.
- Customize the dimensions to fit your specific space.
- Experiment with design variations to match your personal style.
This project is a great way to practice your skills and create something useful for your home. Whether it’s for your entryway or backyard, a custom bench adds both charm and functionality.
Trusted resources like Family Handyman offer additional ideas and tips for building furniture. With a bit of creativity, you can design pieces that reflect your unique taste and meet your needs.
Innovative Projects: Spice Racks and Serving Trays
Adding a personal touch to your kitchen can be both fun and functional. I’ve found that simple DIY projects like spice racks and serving trays not only organize your space but also add a stylish flair. These ideas are perfect for beginners and can be completed with minimal tools.
Easy Spice Rack Assembly
Building a spice rack is a great way to keep your seasonings organized and within reach. I used a 1-7/8 inch Forstner bit to drill precise holes into a 11-1/2 inch wood disc. This allows the rack to hold up to 18 different spices. Here’s how I did it:
- Measure and Drill: Space the holes at 30-degree intervals for even distribution.
- Assemble the Base: Attach a smaller 7-1/4 inch disc using water-resistant wood glue for durability.
- Add Rotation: Install 9-inch lazy Susan hardware for easy access to all spices.
This project is a great way to practice precision and create something useful for your kitchen.
Crafting a Stylish Serving Tray
A serving tray is both practical and decorative. I used a wood ball as a handle knob for a modern touch. Here’s the process I followed:
- Cut the Wood: Use a miter saw to create the tray’s base and sides.
- Assemble: Secure the pieces with wood glue and pin nails for a sturdy finish.
- Finish: Sand the tray and apply a protective coat for a polished look.
This tray is perfect for serving snacks or displaying decorative items. It’s a simple yet rewarding project that adds charm to your kitchen.
These innovative ideas are a great way to enhance your kitchen’s functionality and style. With a bit of creativity, you can create pieces that are both beautiful and practical.
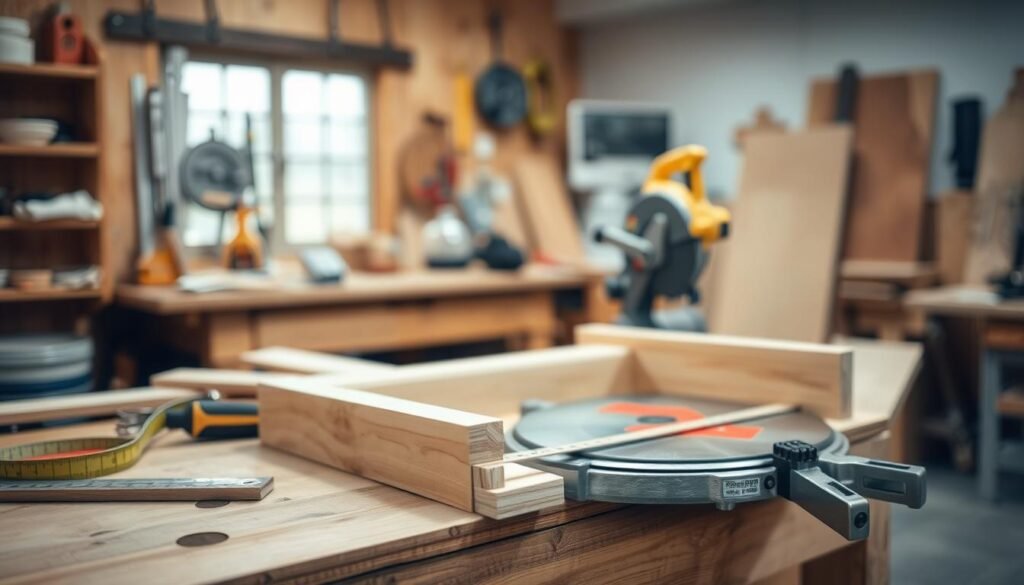
Working with Wood: Tools, Techniques and Tips
Mastering the art of working with wood requires patience, practice, and the right techniques. Over the years, I’ve learned that understanding the process and the materials you’re working with can make all the difference. Here are some of my favorite tips and techniques to help you improve your craftsmanship.
One of the first things I discovered is the importance of understanding the properties of different types of wood. For example, open-grain woods like oak can take stain unevenly, while closed-grain woods like maple provide a smoother finish. Knowing these details helps you choose the right material for your project.
Here are some techniques that have greatly improved my work:
- Milling Lumber: Jointing, planing, and ripping ensure precise blocks of wood for your project.
- Joinery: Techniques like miter joints and butt joints add strength and durability to your pieces.
- Sanding and Finishing: Using the right grits and finishes protects the wood and enhances its appearance.
Safety is another crucial aspect. Always wear protective gear like safety glasses and respirators, especially when using saws or sanders. Regular tool maintenance, such as sharpening blades, also ensures better results and reduces the risk of accidents.
If you encounter issues like uneven cuts or gaps in joints, don’t get discouraged. Troubleshooting is part of the learning process. For example, using clamps during glue-up can prevent misalignment, and filling gaps with epoxy can strengthen joints.
Finally, I encourage you to practice regularly and explore new techniques. Watching expert woodworking videos can also provide valuable insights. With time and dedication, you’ll see your skills grow and your projects improve.
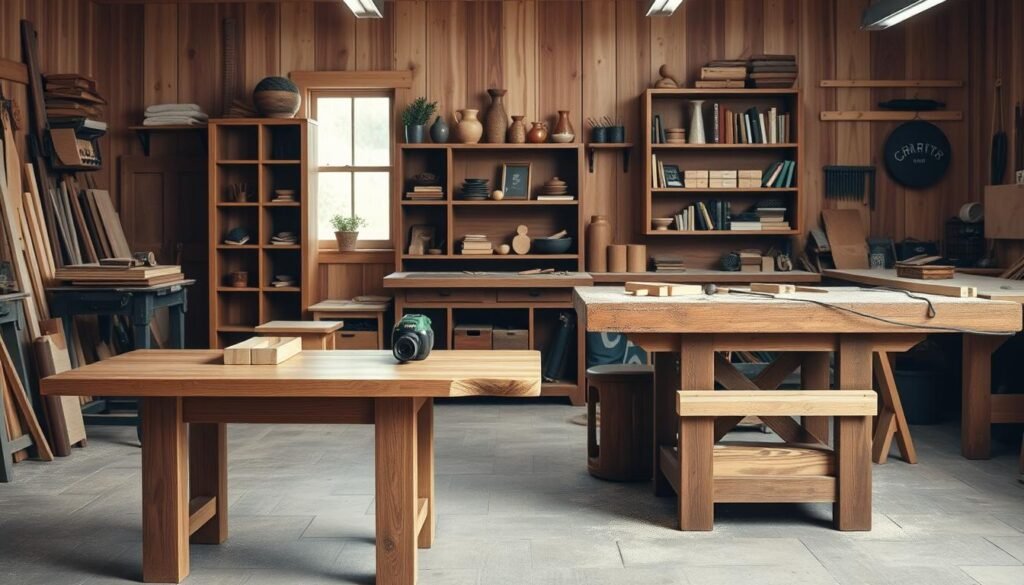
Setting Up Your Woodworking Shop and Workbench
Setting up a dedicated space for your creative work can make all the difference in your DIY journey. Whether you’re working in a garage corner or a small basement, a well-organized shop boosts efficiency and makes the process more enjoyable. Let’s explore how to create a functional workspace, even in limited areas.

Space Organization in a Small Workshop
Maximizing every inch of your space is key to a successful setup. Start by planning your layout to ensure easy access to tools and materials. Wall-mounted storage solutions, like pegboards or French cleats, are a great way to keep your tools organized and within reach. This not only saves floor space but also improves your workflow.
Here’s a quick guide to organizing your shop:
- Workbench Placement: Position your workbench in a central location for easy access to all areas.
- Tool Storage: Use wall-mounted racks or drawers to store frequently used tools.
- Material Storage: Keep wood and supplies off the floor with shelves or vertical racks.
Building Your Own Workbench
A sturdy workbench is the heart of any shop. Building your own allows you to customize it to fit your space and needs. I used affordable materials like plywood and 2x4s to create a durable bench. Here’s a simple breakdown of the process:
| Step | Details |
|---|---|
| Measure and Cut | Determine the size based on your available space. |
| Assemble the Frame | Use screws to secure the legs and supports for stability. |
| Add the Top | Attach a smooth plywood surface for a clean workspace. |
Safety is just as important as organization. Ensure your shop has proper lighting and ventilation. Keep your work area clean to avoid accidents. With these tips, you’ll create a workspace that enhances both efficiency and creativity.
Learning from Online Tutorials and Woodworking Videos
One of the most transformative aspects of my DIY journey has been learning from online tutorials. Videos have made it easier to understand complex techniques and gain confidence in my skills. Whether you’re a beginner or looking to refine your craft, these resources are a game-changer.
Watching experts demonstrate each step has been incredibly helpful. It’s like having a mentor guide you through the process. Visual aids make it easier to grasp details that written instructions might miss. For example, seeing how to properly use a tool or execute a specific technique can save you time and frustration.
“Visual learning bridges the gap between theory and practice, making it easier to master new skills.”
Favorite Video Resources
Over the years, I’ve discovered several trusted channels and websites that offer high-quality tutorials. Here are my top recommendations:
| Resource | Focus |
|---|---|
| Paul Sellers | Hand tool techniques and beginner-friendly projects |
| Woodworking for Mere Mortals | Simple and practical DIY ideas |
| The Wood Whisperer | Advanced techniques and detailed project guides |
These platforms cover everything from basic cutting boards to elaborate furniture pieces. Each video is packed with tips and tricks that make the process enjoyable. For beginners, I recommend starting with Paul Sellers’ channel. His step-by-step approach is both clear and inspiring.
Visual learning has also sparked my creativity. Watching others tackle unique ideas has encouraged me to experiment with my own designs. It’s a great way to stay motivated and keep improving.

If you’re just starting, don’t hesitate to explore these resources. They’re a fantastic way to build confidence and expand your skills. So grab your tools, pick a tutorial, and dive into your next diy adventure!
Enhancing Your Pieces with Finishing and Personal Touches
The final touches on your DIY creation can elevate it from ordinary to extraordinary. Whether you’re staining a shelf or painting a decorative piece, the right finish brings your design to life. Let’s explore how to choose between stain and paint, apply finishes evenly, and add personal details that make your work uniquely yours.

Choosing Stain or Paint
Deciding between stain and paint depends on the look you want to achieve. Stain enhances the natural grain of the wood, giving it a rich, warm tone. It’s perfect for projects where you want the wood’s texture to shine through. Paint, on the other hand, offers endless color options and can completely transform a piece with a bold or subtle hue.
For a budget-friendly option, consider using leftover paint or stain from previous projects. Experimenting with different finishes can help you discover what works best for your style and home décor.
Adding Decorative Details
Personalizing your work is where creativity truly shines. Adding decorative elements like carved patterns, stenciled designs, or even small inlays can make your piece stand out. Here are some ideas to get you started:
- Use wood burning tools to create intricate patterns.
- Apply a contrasting color to highlight edges or details.
- Add hardware like knobs or handles for a functional yet stylish touch.
These small additions can turn a simple project into a one-of-a-kind masterpiece. Don’t be afraid to experiment and let your personality shine through.
Finishing is more than just the last step—it’s what transforms your work into something truly special. With the right techniques and a bit of creativity, you can create pieces that reflect your unique style and enhance your home.
Maintaining Your Workshop: Storage and Organization Tips
Keeping your workshop organized is the key to efficiency and creativity. A well-maintained space ensures smoother project execution and reduces the time spent searching for tools. Over the years, I’ve developed routines and strategies that keep my shop tidy and functional. Here’s how you can do the same.
Tool Maintenance Routines
Regular cleaning and care extend the lifespan of your tools and improve their performance. I follow a simple routine to keep everything in top shape. Start by wiping down tools after each use to remove dust and debris. For blades and cutting edges, use a sharpening stone or file to maintain their precision.
Here’s a quick guide to my maintenance steps:
| Step | Details |
|---|---|
| Cleaning | Wipe tools with a damp cloth and mild soap. |
| Sharpening | Use a sharpening stone for blades and cutting edges. |
| Lubrication | Apply oil to moving parts to prevent rust. |
| Storage | Keep tools in a dry, organized area to avoid damage. |
These steps ensure your tools remain reliable and ready for every project.
Efficient Workbench Storage Ideas
Maximizing your workbench space is essential for a clutter-free shop. I use wall-mounted pegboards to keep frequently used tools within reach. This not only saves space but also improves workflow efficiency. For smaller items like screws and nails, I repurpose jars or small bins, labeling them for easy access.
Here are some tips to organize your workbench:
- Use pegboards or hooks for hanging tools.
- Store small items in labeled jars or bins.
- Keep frequently used tools at eye level for quick access.
- Use drawer dividers to separate and organize hardware.
These strategies help maintain a tidy and efficient workspace, allowing you to focus on your projects without distractions.
A well-organized shop is a vital part of every successful DIY endeavor. By implementing these routines and storage ideas, you’ll create a space that inspires creativity and productivity. So, take the time to organize your workshop—it’s an investment that pays off in every piece you create.
Start Your Basic Wood Project Today
Crafting with your own hands is a journey filled with creativity and satisfaction. From selecting the right tools to adding the final touches, each step brings a sense of accomplishment. Whether you’re building a shelf or designing a picture frame, every project is an opportunity to learn and grow.
Feel free to revisit this guide for detailed steps and inspiration. I’m excited for you to start your own journey and create something truly unique. Crafting is not just practical—it’s a deeply fulfilling way to express yourself and transform your space.
FAQ
What tools do I need to start my first DIY project?
I recommend starting with a saw, hammer, measuring tape, and sandpaper. These essentials will help you tackle most beginner-friendly tasks like building a shelf or crafting a picture frame.
How do I choose the right wood for my project?
I always consider the purpose of the piece. For something sturdy like a table, I go with hardwoods like oak. For lighter items like a serving tray, pine or cedar works great.
What’s the best way to organize a small workshop?
I use wall-mounted racks and pegboards to save space. Keeping tools off the floor and labeling storage bins helps me stay efficient in my compact shop.
How can I make my wood pieces look more polished?
I love adding a coat of stain or paint for a finished look. Sanding thoroughly before applying any finish ensures a smooth, professional result.
Are online tutorials helpful for beginners?
Absolutely! I’ve learned so much from video tutorials. They’re a great way to see techniques in action and get step-by-step guidance for your first project.
What’s an easy beginner project to try?
I suggest starting with a simple shelf or a cutting board. These projects are straightforward and help you practice measuring, cutting, and assembling.
How do I maintain my tools for longevity?
I clean my tools after each use and store them in a dry place. Regularly sharpening blades and oiling moving parts keeps them in top shape.
Can I build furniture on a budget?
Yes! I often repurpose old wood or use affordable materials like plywood. With a bit of creativity, you can create stylish benches or tables without spending much.
What safety tips should I follow in my workshop?
I always wear safety goggles and gloves. Keeping my workspace clean and using tools properly helps prevent accidents while I work.
How do I add personal touches to my wood pieces?
I like to carve initials, add decorative edges, or use unique paint colors. These small details make each piece feel special and one-of-a-kind.